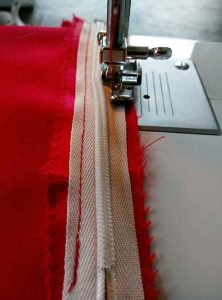
Holiday skulottes!

Posted on Leave a comment
My funky, reversible culottes turned out pretty well, non?

With the weather in France still too warm for trousers, I decided I could do with a new pair of shorts, or a skirt, or culottes, perhaps? As with my dress project, my design choices are dictated by what I can make with the limited sewing resources available and the suitability of the fabric and haberdashery that I can find in our local home-furnishing store and ‘mercerie’.
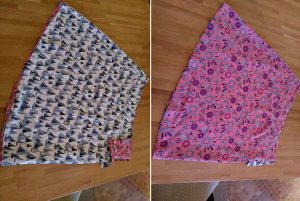
My original skirt, showing button and loop closure.

For the sewing pattern, I have a favourite skirt with me that will do as a basis for the design. It’s cleverly made – fully-reversible, with 3″ yoke or waistband, and a button and loop side opening. How cool would it be to have a fully-reversible pair of culottes? (Now, the more experienced amongst you will realise that there is likely to be a problem creating a reversible pants pattern, but we’ll ignore that for the time being.)

So, let’s get to work.
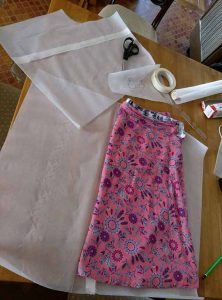
Converting the basic skirt pattern for culottes

While this simple A-line skirt was cut in two sections (plus waistband), generally, adult-sized pants – be they shorts, trousers or culottes – need to be cut in four. The first thing was to fold my skirt in half to trace the outline. Unfortunately, the shaped hemline turned out to be just ever so slightly too wide for a single sheet of greaseproof paper, so I had to join two sheets with sticky tape. *Note to self: greaseproof paper is, by its very nature, non-stick!

Having traced around the original skirt outline, I now needed to add the allowance for the crotch and legs of my culottes. The most important thing when making pants is to measure the distance from your waist to your crotch, front and back.
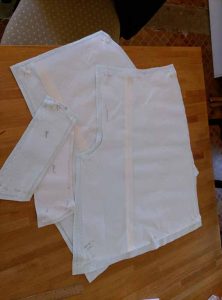
Front, back and waistband sections of the culottes.

Whereas the front and back sections of the skirt are identical, when cutting pants, you need to allow a bit of extra room at the back for your curvy bits. Thus the back waist to crotch measurement is going to be longer than the front. Using a pair of my own trousers as a guide, I eye-balled the shaping of the seam.

Once I had cut the sections for the front and back of my culottes, I tried the pieces against me. They seemed a reasonable fit, so the only other major pattern pieces were the front and back waistband.

As I often do, I cut the paper pattern to the finished size and added 1cm seam allowance all round, and a 2cm hem. I had bought 1m each of two contrasting cotton fabrics and pre-washed them. Under normal circumstances, I would have placed the pattern pieces with the vertical grain in line with the warp of the fabric, parallel with the selvages. Unfortunately, in this instance, the slight shrinkage would not have allowed enough fabric for the seam allowances, so I arranged the pattern with the grain lines at 90 degrees to the selvage. The cotton has no appreciable difference in stretch, width-wise or length-wise, and the design has no obvious direction (nap), so it shouldn’t matter.
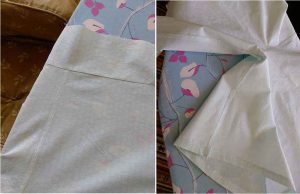
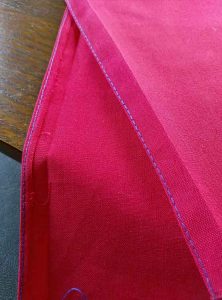
Right: flat-fell seam finish, centre front and back. Left: zig-zag seam finish and hem.

Since the culottes were a bit of an experiment, I cut out and sewed the first – pale green – version before touching the contrast fabric. In terms of the basic construction, I used a flat fell seam centre back and front, and neatened the inside leg and side seams using zig-zag stitch. After attaching the waistband, I left a 6″ opening in the left side seam. I also sewed a 15mm hem around the bottoms of the legs. Gratifyingly, they fitted more or less as I expected them to, even if they didn’t have quite the ‘skirt’ look I was trying to achieve. ‘Skulottes’, then!
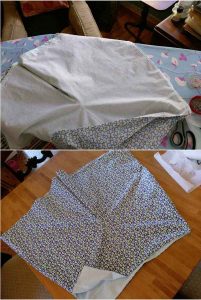
Joining the contrasting sections. The reversible culottes take shape.

All being well with the first pair, I went ahead and constructed an identical pair in the blue fabric. However, rather than stitch the hem of the second version, I allowed myself some leeway for final adjustment by simply pressing and basting the hem allowance. Then I attached the contrasting culottes at the waist and turned them the right way out.
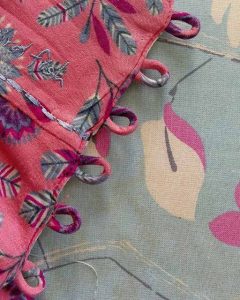
Fabric loops aren't difficult and are an attractive alternative to buttonholes.
Fabric loops aren’t difficult and are an attractive alternative to buttonholes.

I had managed to find some bright-coloured 11mm buttons in green and blue, so now I needed to create the fabric loops for the closure. If you’ve never tried this before, do. It’s much easier than it might look, and it gives a very professional-looking ‘couture’ finish.

Cut a rectangle of cloth about 4cm wide and as long as you need – I allowed 5cm per loop. Press it in half, and insert a narrow piece of piping cord (quaintly called a ‘queue du rat’ in French) into the fold. (You need the piping cord to be a good bit longer than the cloth, to allow you to keep a good grip on it.)

Sew across the top of the folded fabric, trapping the cord in the stitching. Trim off any excess cord and fabric to within 4mm or so. Now, using a piping or zipper foot, sew down the length, keeping the sewing machine foot close to (but not tight against) the cord. You’re going to trim the fabric so, to prevent fraying, put in a second row of stitching very close to the first.

Now trim away the excess fabric closely enough so that what remains will fit into the tube left by the cord. Way … what …? How does that work?!

1. Stitch end of cord into fold. 2. Stitch two rows lengthwise, close to cord. 3. Pull loose end of cord and tuck in top end. 4. Continue to pull cord through and redistribute the puckers as they form.

Trust me. Take a firm hold of the ‘loose’ end of the piping cord in one hand and keep a gentle hold of the top with the other. Now, start pulling the cord through. Quite naturally, what will happen is that the ‘attached’ top end will try to turn inside out. It will probably get stuck to start with, so you might have to tease the top edge with a pin to tuck it in, but once the whole of the raw end has disappeared inside the tube, you will find that, by maintaining a constant pull on the bottom end of the cord and distributing the puckers as they form at the top, you will gradually be able to pull the cord all the way through and you’ll be left with a neat length of turned looping. Depending on the thickness of your cord, you can decide whether you want to leave it in place (for a more rounded loop), or snip off the secured top and pull it out (for a flatter loop). Now all you need to do is divide the fabric tube up into equal lengths for the individual button loops.
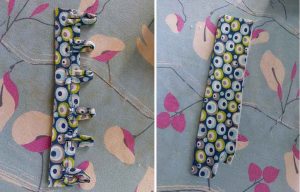
Left: for convenience, I attached the loops to a folded strip of fabric. Right: then I needed to create a facing for the button-side of the opening. *Contrasting fabric, front and back.

To attach the loops to the culottes, I spaced them out and stitched them to another folded strip of fabric, which I then sandwiched between the fabric layers of the front side opening. For the back, I constructed a 6″-long, 25mm-wide facing from the contrasting fabrics, with a sewn tab at the bottom. The raw edges of the facing were then sandwiched between the fabric layers of the back side opening, with the tab remaining free to be pushed either side of the opening, depending which way out I was wearing the culottes.
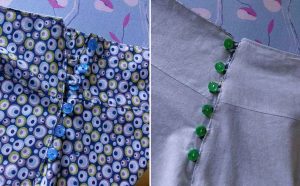
This is how the buttons look for on their respective right sides.

I’ve nearly finished, except for the buttons and the remaining hem, which needed a tiny bit of adjustment to be perfectly level with the contrasting layer. I took out the basting, re-pressed the hem and trimmed away the excess fabric before stitching.
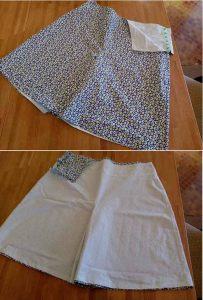
Finished culottes, showing fabric contrast.

So there we have them, a fun and funky pair of ‘skulottes’ for my wardrobe. Of course, while copying the original skirt pattern for size makes them a comfortable fit, they aren’t quite as perfectly reversible. Because pants patterns have a definite ‘front’ and ‘back’, wearing the pale green contrast fabric version of my culottes will mean that they do up on the right, rather than the left …

My funky, reversible culottes turned out pretty well, non?

Installing an invisible zip without the special foot

Posted on Leave a comment
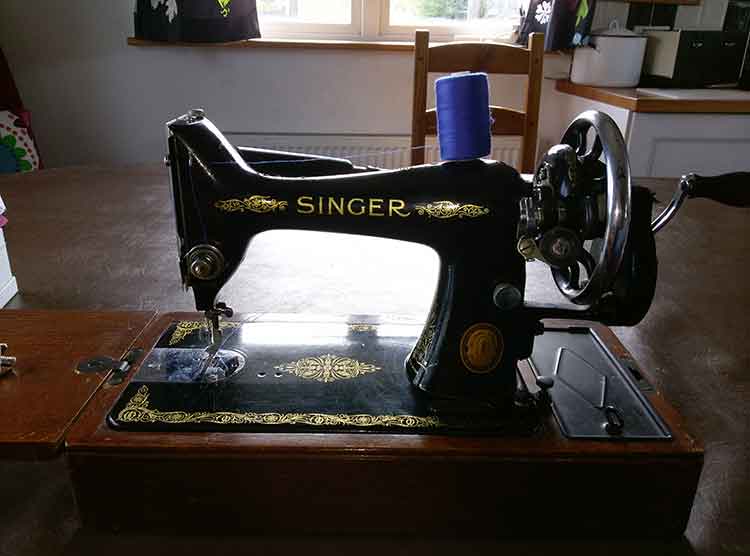
Singer K99 sewing machine

After my last post, partly in response to an enquiry about where to buy an invisible zip foot (see below)*, and partly for the craic, I decided to include a tutorial showing how to install an invisible zip when you don’t have the special foot. For this exercise, I’m using my mother’s 1952, hand-crank, K99 Singer sewing machine.

The machine itself is a thing of beauty and, while it has been neglected for some 30-odd years, it only needed a little basic TLC to prepare it for this little project. I cleaned the lint out of the bobbin race and take-up mechanism, applied a wee drop of 3-in-1 oil here and there (according to the instruction book), changed the needle, checked the thread tension and stitch length, and was good to go.

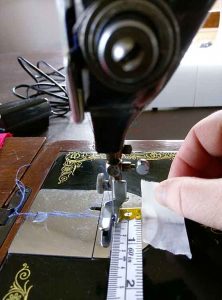
Improvised seam gauge
Improvised seam gauge using a 15mm wide tape measure and masking tape.

I learned to sew on this type of machine, but I’d forgotten how different an experience it was. There’s no removable free arm for sleeves, no helpful grid-lines marked on the polished chrome foot plate (I used a piece of masking tape), and no reverse stitch or zig-zig. The machine weighs a ton, compared with the modern, plastic-clad models, and has none of the built-in safety features we take for granted today. The balance wheel has a spokes and a revolving weight that (especially when fitted with an electric ‘accelerator’ motor) continues to rotate under its own momentum until physically stopped, and the machine foot is so small and unobtrusive, as to make it perfectly possible to catch your fingers under the needle!

Nevertheless, as I will show, this old machine has all the essentials, when it comes to zip installation – even for invisible zips.

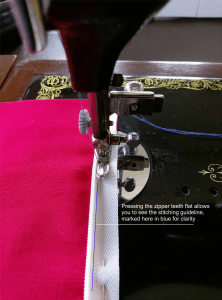
First things first. Because I have no special foot to regulate my stitching, it’s essential to press the zipper teeth flat to reveal the stitching guideline on the zipper tape.

Turned-under finish for raw edges

Turned-under seam finish

As usual for this type of zip, we’re leaving the seam completely unsewn until we’ve installed it. However, we still need to neaten those raw edges to stop them fraying. As the machine has no zig-zag stitch, I’ve pressed the 5/8″ (15mm) seam allowance, then turned the raw edge under by 1/8″ (about 2.5mm) and stitched it close to the fold – time-consuming but, I hope you agree, very neat.

Stitching the zip using the regular zipper foot

zipper tape stitching line
Sewing close to the zipper teeth, using the zipper tape stitching line as a guide.

Using the pressed crease as a guide, I position the zipper tape over the seam line and pin it in place. Now I change the regular sewing machine foot for the dinky little adjustable zipper foot, and start stitching top to bottom, close to the teeth, inside the zipper tape guideline. With this foot

I can stitch almost all the way to the zip slider.

Securing threads

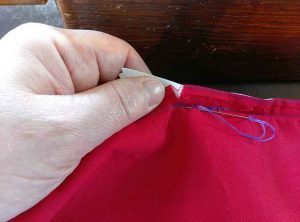
There’s no reverse stitch, so I pull the needle thread through to the back side of my work and hand-stitch both the needle and bobbin threads back into the seam to secure them. (Otherwise, you could pull the needle thread through and then tie them both off in a knot.)

I close the zip, and pin the teeth over the seamline on the other section of fabric, right sides together, as usual.

Now I open the zip, leaving the pins in place, and adjust the zipper foot so that the needle is to the right of it. Then I stitch top to bottom, following the guideline, as before.

Finishing the zip installation

Joining the seam
Clip the seam allowance at the bottom of the zipper stitching for a neat finish.

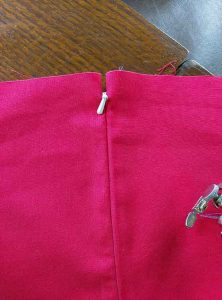
Clip the seam allowance at the bottom of your stitching and secure your threads. As with my first invisible zip tutorial, finish off by pinning the seam below the zip and stitch to meet the zip stitching, using the pressed crease as a guideline.

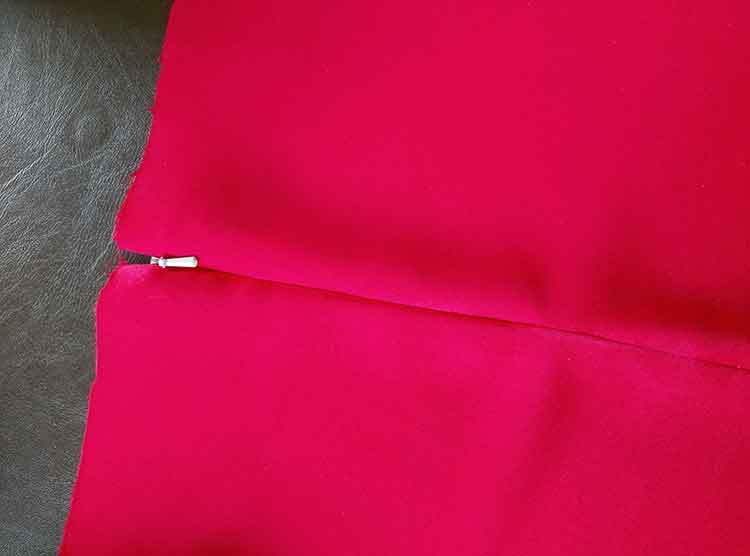
Perfectly invisible zip
The finished zip. Perfectly invisible, without any special accessories.

I think you’ll agree that the finish doesn’t differ greatly from the one I put in using a modern machine with a special foot.

* Going back to that original enquiry. I have now identified a wholesaler for sewing machine accessories, so should shortly be adding universal-fitting specialist presser feet to my product range. Watch this space!

Invisible zip magic

Posted on 1 Comment

People complain about concealed or ‘invisible’ zips. They find them awkward, fiddly, unsuccessful – but they don’t have to be. Providing that you have the special sewing machine foot, they are quick to install and they look great – to the extent that I always recommend them to my beginner dressmakers, especially for dresses with a centre back zip opening.


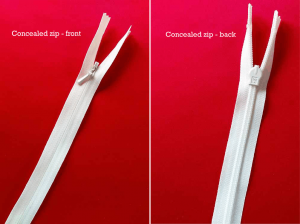
The right and wrong sides of an invisible or concealed zip.

What distinguishes an invisible zip is that the teeth are concealed on the back of the zipper tape, and the front is smooth. When correctly installed, the only part that shows is the decorative pull tab at the top. If you open a YKK zip and press it before stitching, you will be able to see the stitching guideline that is normally hidden by the curl of the teeth. The other difference is in the application, in that you would normally leave the seam completely unsewn until you had installed the zip.


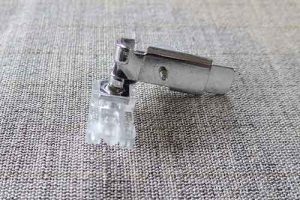
Universal-fit invisible zip foot
Universal-fit adjustable invisible zipper foot

So, let’s get to work. For this example, I’m using a basic Singer Serenade machine, with a Janome-brand universal invisible zip foot and a 9″ YKK concealed zip. The fabric is a rather lovely duchesse satin, but one that frays horribly!

We’re going to leave the seam completely open and unsewn, until the zip is in. However, you should think of finishing the raw edges before you start. The Singer doesn’t have an overlock stitch, so I’ve used a narrow row of zig-zag.

As with all zips, you’ll get a better result if you sew both sides from top to bottom.

Placement of an invisible zip

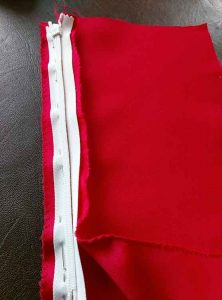
The two sections of fabric are not joined, so we’ll deal with one section at a time. Open the zip and place it, face down, on the right side of the fabric, with the teeth on the seamline and the tape in the seam allowance.

Tip: did you know a lot of standard tape measures are 15mm (or 5/8″) wide – providing a useful gauge for the seam allowance of most commercial dressmaking patterns?


 Stitching an invisible zip

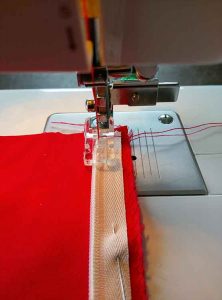
Line the teeth up with the stitching line and ensure they are correctly located in the foot’s groove.

I’m going to stitch the right-hand side of the zip first, so I’ve lowered the machine foot with the left-hand groove sitting over the zipper teeth. Before you start stitching, double-check that the teeth are fully in the groove. Remember to back-stitch a few stitches to secure the threads.

Stitch all the way to the bottom of the zip until the foot meets the zip slider. Stop and back-stitch to secure. Don’t worry that you haven’t been able to stitch the whole tape. We’ll finish it off later.


Close the zip to pin other side accurately.


Now, close the zip and pin the other side of the zipper tape to the [left-hand] half of the garment, in the seam allowance. Open the zip and position the foot at the top of the zip, with the right-hand groove over the zipper teeth. Stitch as far as the slider, as before.

*You don’t have to close the zip to pin it to the other side of the garment. A lot of online demos show the seamstress pinning an open zip onto the opposite piece of fabric and simply stitching it in place. That method will work fine with sample fabric patches but, if you’re sewing garment sections and you want to line up necklines, waistlines or patterns, closing the zip before pinning is more reliable.

Finishing an invisible zip

So now you have two pieces of fabric joined by the zip, but open below the slider. We need to finish off the seam. Before we do, snip the seam allowance on both sides, where your stitching ends.

Closing the seam below zip
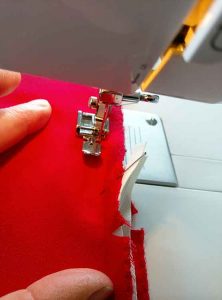
I use a regular zipper foot to close the seam, as it allows me to sew close to the zipper teeth.

At this point, I recommend that you change your special invisible zip foot for the regular zip foot that came with the machine. Position it so that the needle passes to the right of the foot.

Pin the seam as usual, below the zip, and stitch using the normal seam allowance, aiming to meet up with (and slightly overlap) your zip stitching. Like mine in the photo, you might find that you don’t quite find the same line, but the couple of millimetres’ gap won’t show on the right side. I promise.


stitch-zipper-tape-to-seam-allowance
Stitch the zipper tape to the seam allowances, taking care not to catch the right side of the garment in the stitching.

Finally, stitch the zipper tape to the seam allowance. To all intents and purposes, that’s it. With a little careful pressing, you should now have a perfect invisibly-installed zip. The one last thing you might like to do is to stitch the zipper tape to the seam allowances for stability and a little reinforcement.

And there you have it. A perfectly invisible zip application. That wasn’t so hard, was it?