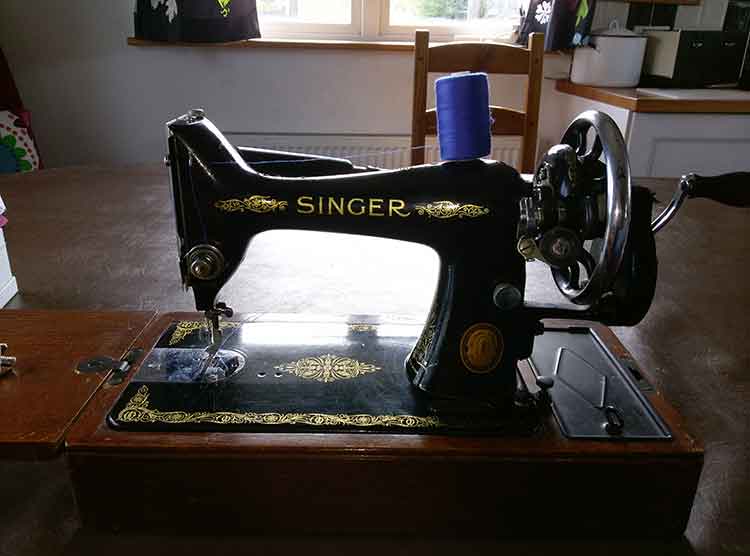
After my last post, partly in response to an enquiry about where to buy an invisible zip foot (see below)*, and partly for the craic, I decided to include a tutorial showing how to install an invisible zip when you don’t have the special foot. For this exercise, I’m using my mother’s 1952, hand-crank, K99 Singer sewing machine.
The machine itself is a thing of beauty and, while it has been neglected for some 30-odd years, it only needed a little basic TLC to prepare it for this little project. I cleaned the lint out of the bobbin race and take-up mechanism, applied a wee drop of 3-in-1 oil here and there (according to the instruction book), changed the needle, checked the thread tension and stitch length, and was good to go.
I learned to sew on this type of machine, but I’d forgotten how different an experience it was. There’s no removable free arm for sleeves, no helpful grid-lines marked on the polished chrome foot plate (I used a piece of masking tape), and no reverse stitch or zig-zig. The machine weighs a ton, compared with the modern, plastic-clad models, and has none of the built-in safety features we take for granted today. The balance wheel has a spokes and a revolving weight that (especially when fitted with an electric ‘accelerator’ motor) continues to rotate under its own momentum until physically stopped, and the machine foot is so small and unobtrusive, as to make it perfectly possible to catch your fingers under the needle!
Nevertheless, as I will show, this old machine has all the essentials, when it comes to zip installation – even for invisible zips.
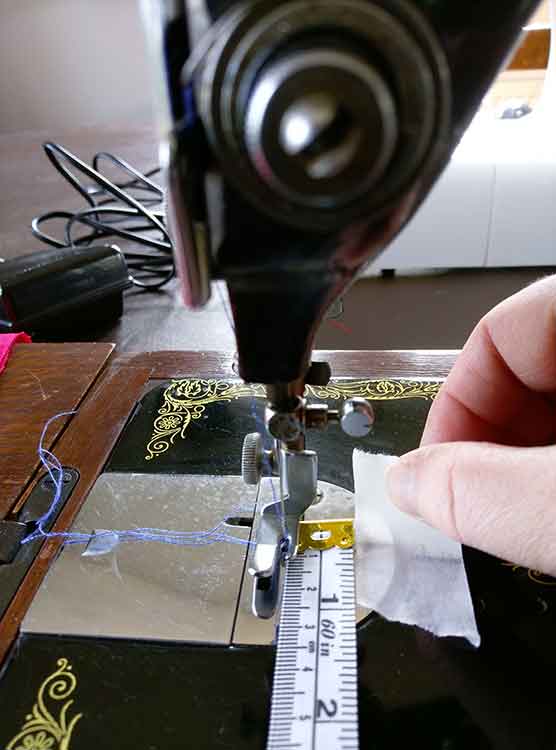
First things first. Because I have no special foot to regulate my stitching, it’s essential to press the zipper teeth flat to reveal the stitching guideline on the zipper tape.
Turned-under finish for raw edges
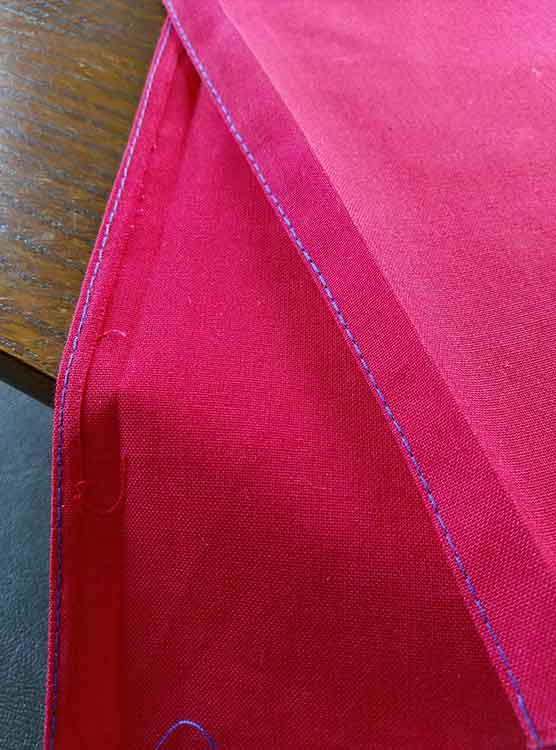
As usual for this type of zip, we’re leaving the seam completely unsewn until we’ve installed it. However, we still need to neaten those raw edges to stop them fraying. As the machine has no zig-zag stitch, I’ve pressed the 5/8″ (15mm) seam allowance, then turned the raw edge under by 1/8″ (about 2.5mm) and stitched it close to the fold – time-consuming but, I hope you agree, very neat.
Stitching the zip using the regular zipper foot
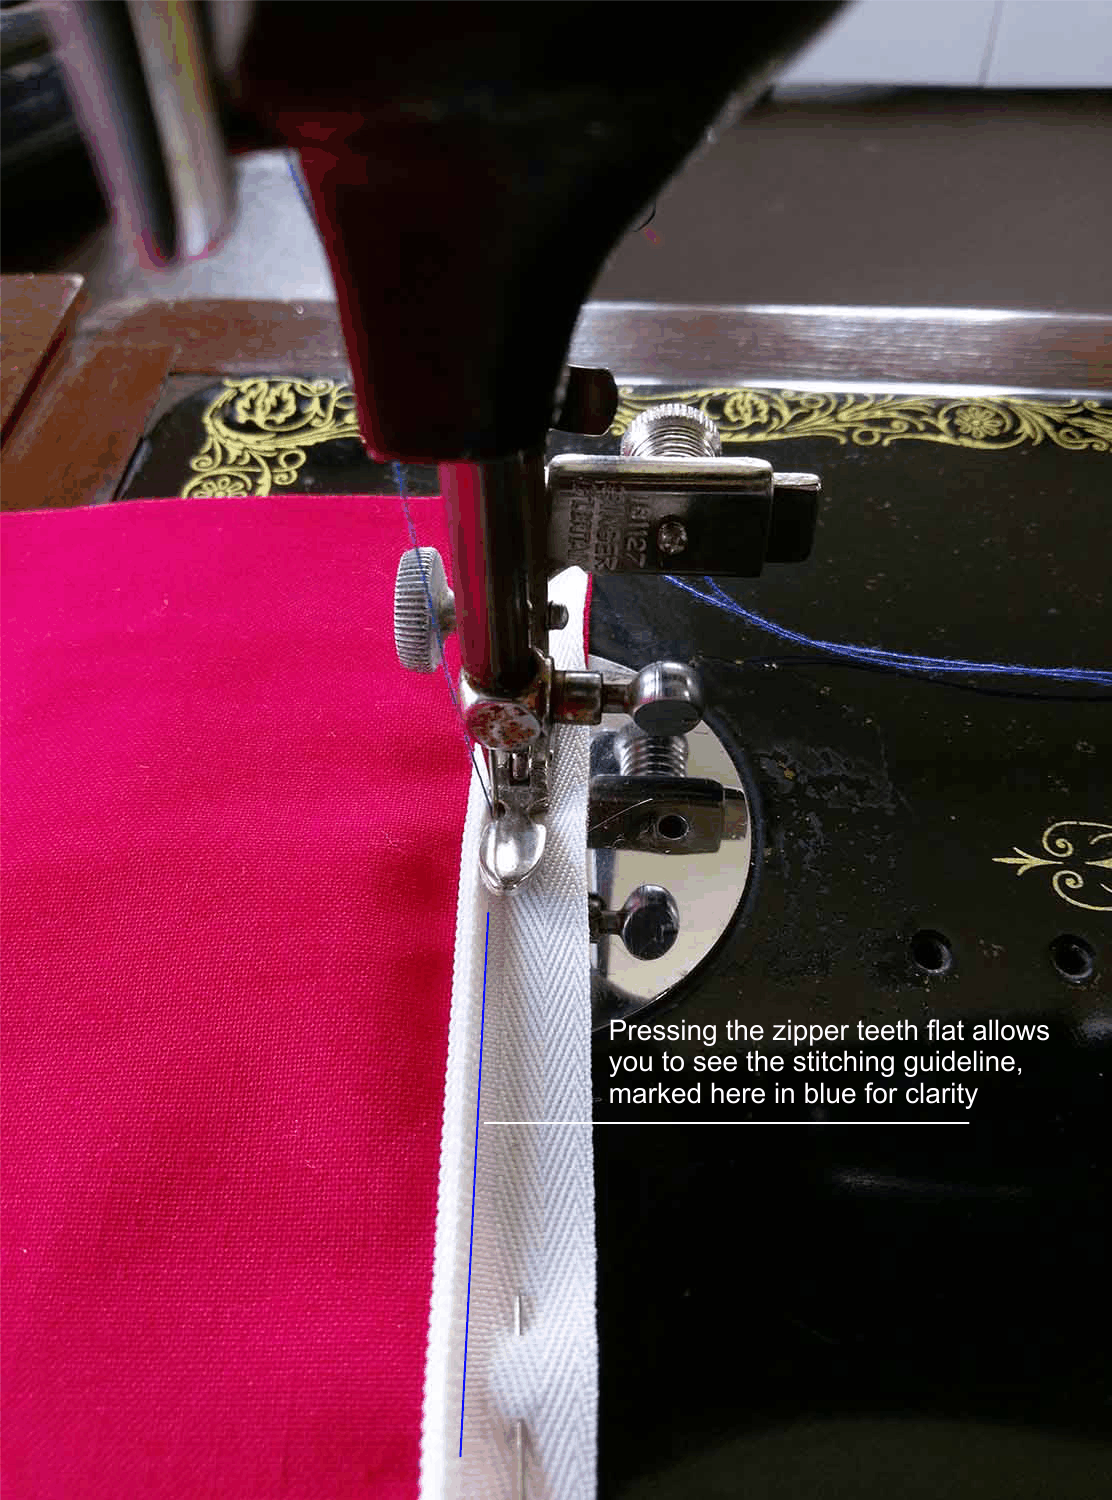
Using the pressed crease as a guide, I position the zipper tape over the seam line and pin it in place. Now I change the regular sewing machine foot for the dinky little adjustable zipper foot, and start stitching top to bottom, close to the teeth, inside the zipper tape guideline. With this foot
I can stitch almost all the way to the zip slider.
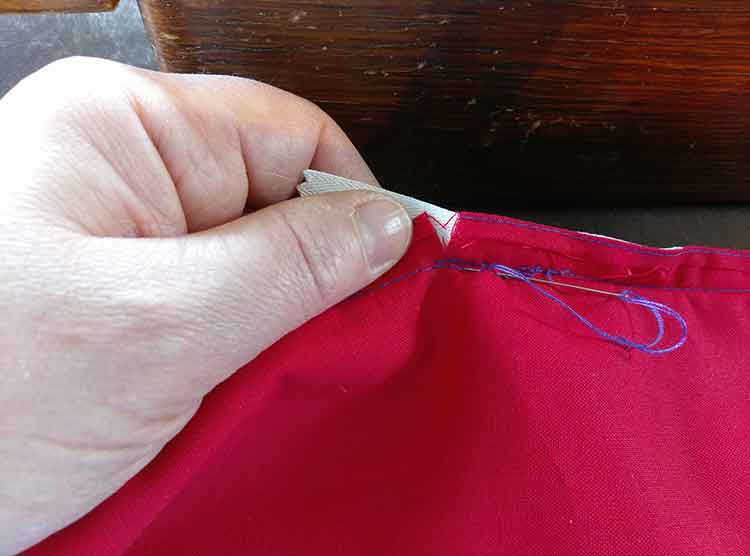
Securing threads
There’s no reverse stitch, so I pull the needle thread through to the back side of my work and hand-stitch both the needle and bobbin threads back into the seam to secure them. (Otherwise, you could pull the needle thread through and then tie them both off in a knot.)
I close the zip, and pin the teeth over the seamline on the other section of fabric, right sides together, as usual.
Now I open the zip, leaving the pins in place, and adjust the zipper foot so that the needle is to the right of it. Then I stitch top to bottom, following the guideline, as before.
Finishing the zip installation
Clip the seam allowance at the bottom of your stitching and secure your threads. As with my first invisible zip tutorial, finish off by pinning the seam below the zip and stitch to meet the zip stitching, using the pressed crease as a guideline.
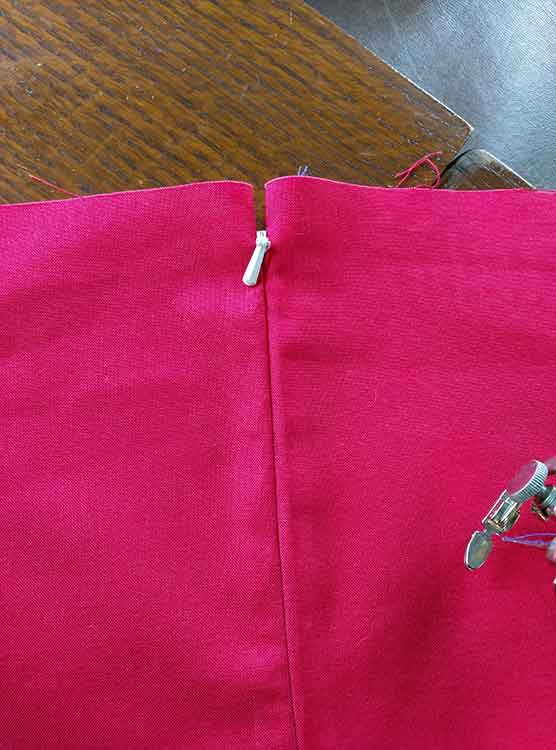
I think you’ll agree that the finish doesn’t differ greatly from the one I put in using a modern machine with a special foot.
* Going back to that original enquiry. I have now identified a wholesaler for sewing machine accessories, so should shortly be adding universal-fitting specialist presser feet to my product range. Watch this space!