
With the weather in France still too warm for trousers, I decided I could do with a new pair of shorts, or a skirt, or culottes, perhaps? As with my dress project, my design choices are dictated by what I can make with the limited sewing resources available and the suitability of the fabric and haberdashery that I can find in our local home-furnishing store and ‘mercerie’.
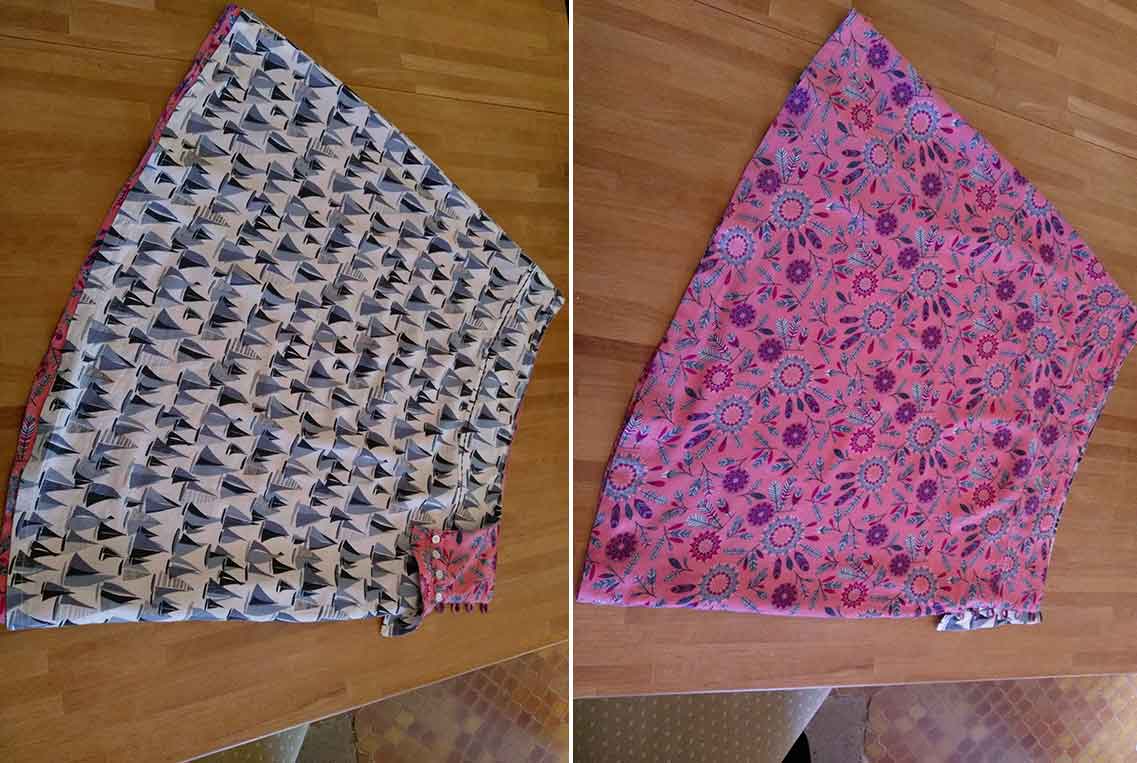
For the sewing pattern, I have a favourite skirt with me that will do as a basis for the design. It’s cleverly made – fully-reversible, with 3″ yoke or waistband, and a button and loop side opening. How cool would it be to have a fully-reversible pair of culottes? (Now, the more experienced amongst you will realise that there is likely to be a problem creating a reversible pants pattern, but we’ll ignore that for the time being.)
So, let’s get to work.
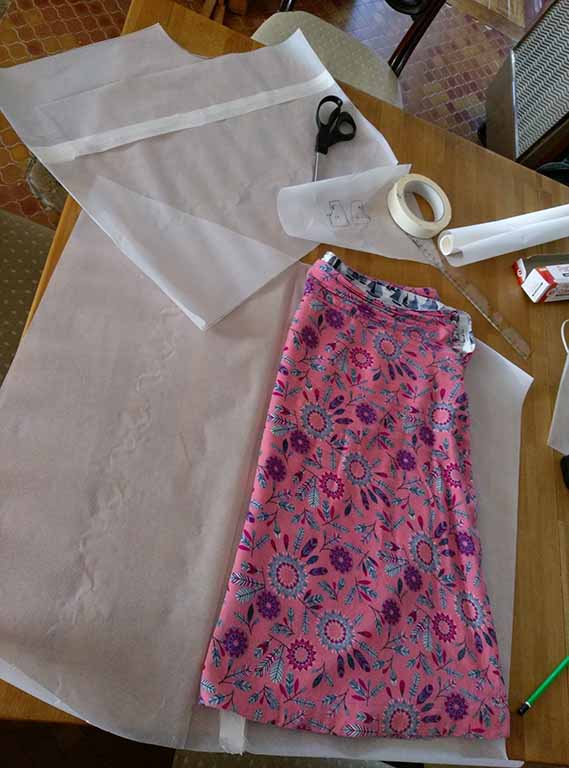
While this simple A-line skirt was cut in two sections (plus waistband), generally, adult-sized pants – be they shorts, trousers or culottes – need to be cut in four. The first thing was to fold my skirt in half to trace the outline. Unfortunately, the shaped hemline turned out to be just ever so slightly too wide for a single sheet of greaseproof paper, so I had to join two sheets with sticky tape. *Note to self: greaseproof paper is, by its very nature, non-stick!
Having traced around the original skirt outline, I now needed to add the allowance for the crotch and legs of my culottes. The most important thing when making pants is to measure the distance from your waist to your crotch, front and back.
Whereas the front and back sections of the skirt are identical, when cutting pants, you need to allow a bit of extra room at the back for your curvy bits. Thus the back waist to crotch measurement is going to be longer than the front. Using a pair of my own trousers as a guide, I eye-balled the shaping of the seam.
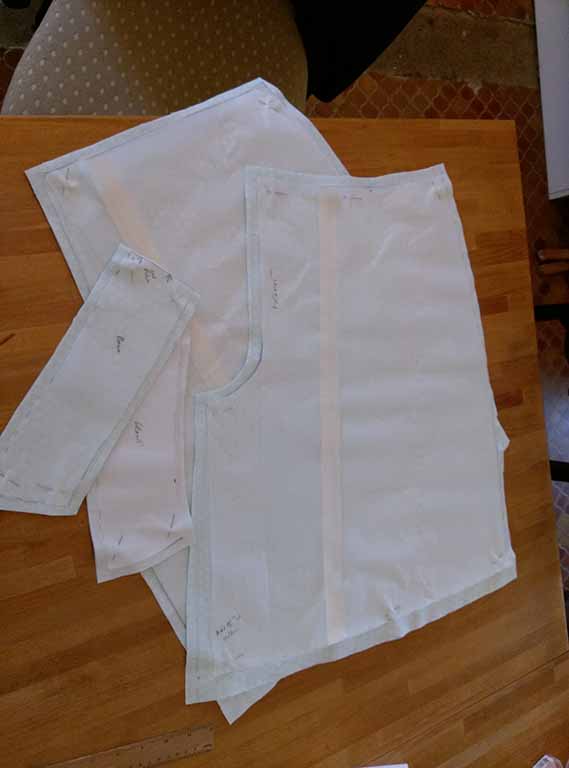
Once I had cut the sections for the front and back of my culottes, I tried the pieces against me. They seemed a reasonable fit, so the only other major pattern pieces were the front and back waistband.
As I often do, I cut the paper pattern to the finished size and added 1cm seam allowance all round, and a 2cm hem. I had bought 1m each of two contrasting cotton fabrics and pre-washed them. Under normal circumstances, I would have placed the pattern pieces with the vertical grain in line with the warp of the fabric, parallel with the selvages. Unfortunately, in this instance, the slight shrinkage would not have allowed enough fabric for the seam allowances, so I arranged the pattern with the grain lines at 90 degrees to the selvage. The cotton has no appreciable difference in stretch, width-wise or length-wise, and the design has no obvious direction (nap), so it shouldn’t matter.
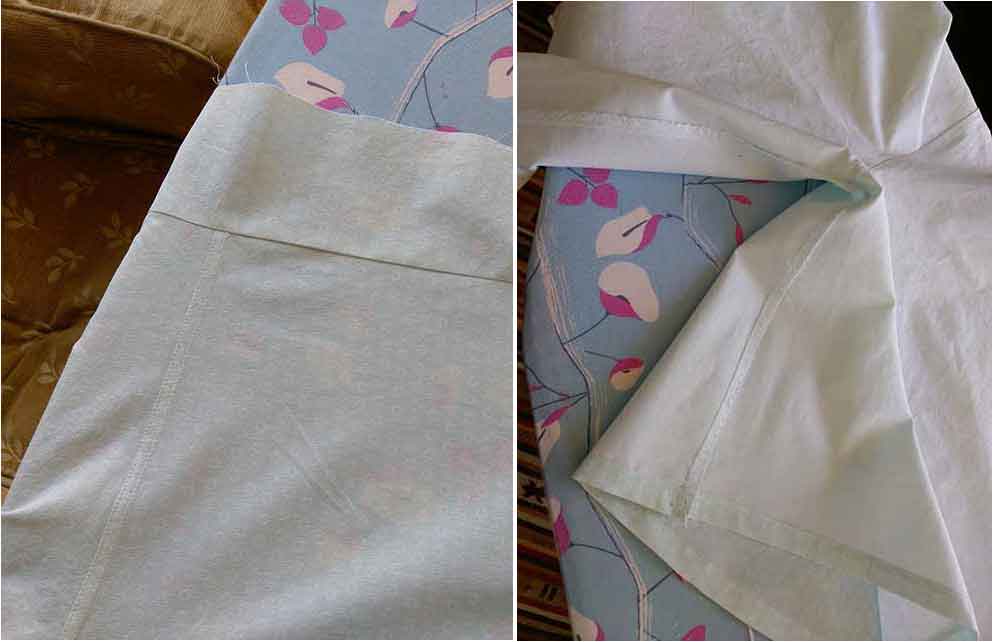
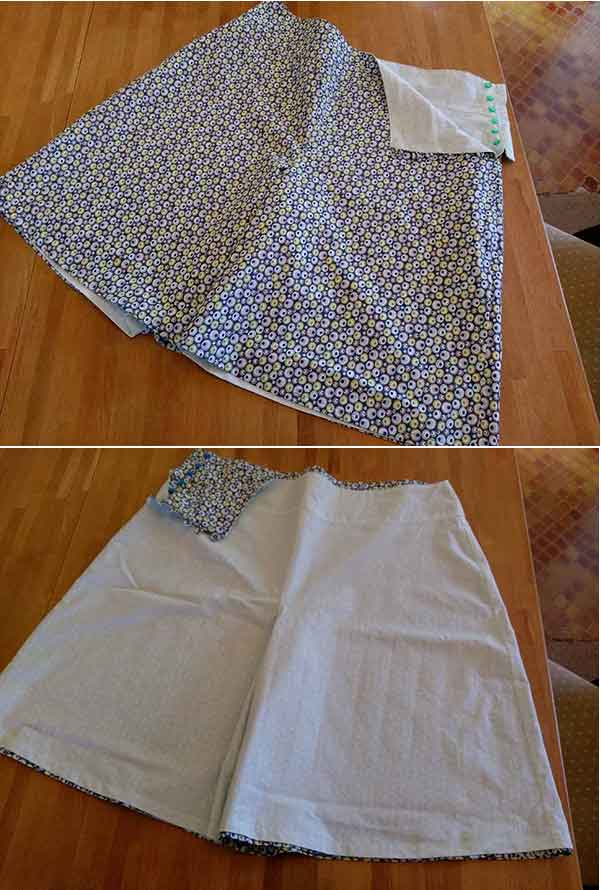
Since the culottes were a bit of an experiment, I cut out and sewed the first – pale green – version before touching the contrast fabric. In terms of the basic construction, I used a flat fell seam centre back and front, and neatened the inside leg and side seams using zig-zag stitch. After attaching the waistband, I left a 6″ opening in the left side seam. I also sewed a 15mm hem around the bottoms of the legs. Gratifyingly, they fitted more or less as I expected them to, even if they didn’t have quite the ‘skirt’ look I was trying to achieve. ‘Skulottes’, then!
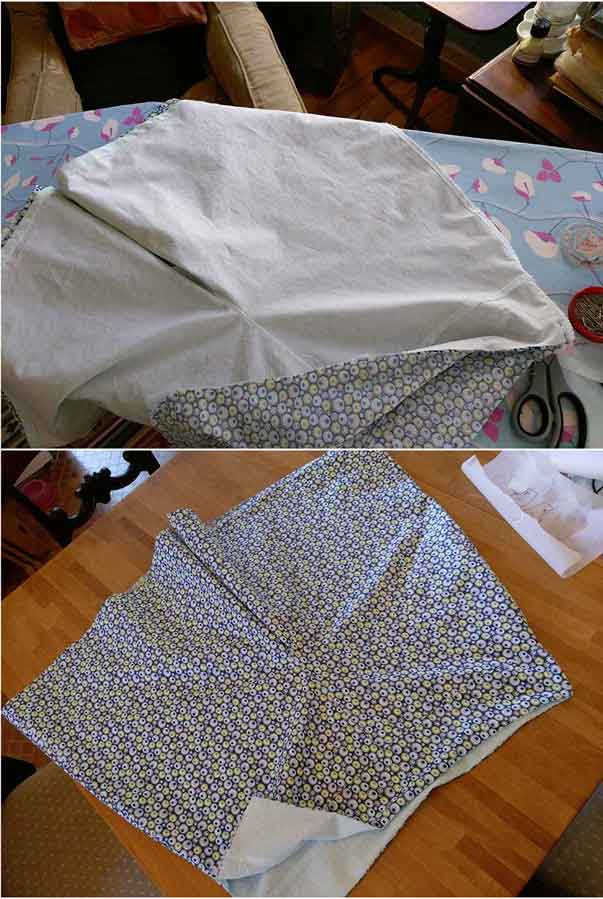
All being well with the first pair, I went ahead and constructed an identical pair in the blue fabric. However, rather than stitch the hem of the second version, I allowed myself some leeway for final adjustment by simply pressing and basting the hem allowance. Then I attached the contrasting culottes at the waist and turned them the right way out.

I had managed to find some bright-coloured 11mm buttons in green and blue, so now I needed to create the fabric loops for the closure. If you’ve never tried this before, do. It’s much easier than it might look, and it gives a very professional-looking ‘couture’ finish.
Cut a rectangle of cloth about 4cm wide and as long as you need – I allowed 5cm per loop. Press it in half, and insert a narrow piece of piping cord (quaintly called a ‘queue du rat’ in French) into the fold. (You need the piping cord to be a good bit longer than the cloth, to allow you to keep a good grip on it.)
Sew across the top of the folded fabric, trapping the cord in the stitching. Trim off any excess cord and fabric to within 4mm or so. Now, using a piping or zipper foot, sew down the length, keeping the sewing machine foot close to (but not tight against) the cord. You’re going to trim the fabric so, to prevent fraying, put in a second row of stitching very close to the first.
Now trim away the excess fabric closely enough so that what remains will fit into the tube left by the cord. Way … what …? How does that work?!
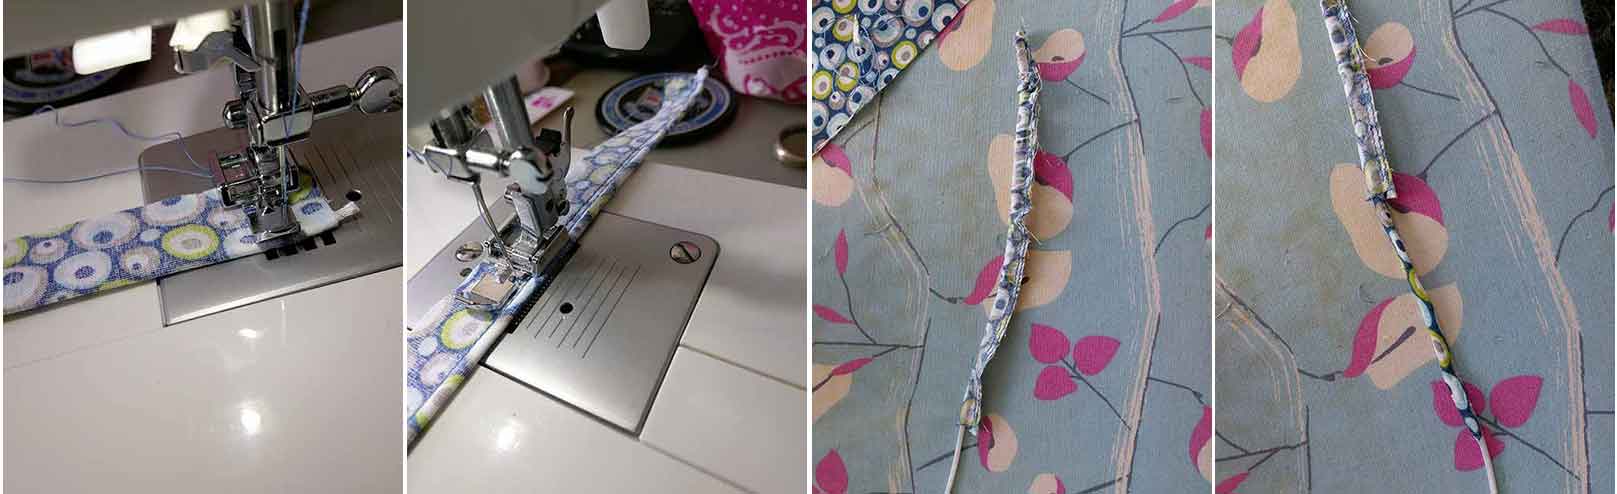
Trust me. Take a firm hold of the ‘loose’ end of the piping cord in one hand and keep a gentle hold of the top with the other. Now, start pulling the cord through. Quite naturally, what will happen is that the ‘attached’ top end will try to turn inside out. It will probably get stuck to start with, so you might have to tease the top edge with a pin to tuck it in, but once the whole of the raw end has disappeared inside the tube, you will find that, by maintaining a constant pull on the bottom end of the cord and distributing the puckers as they form at the top, you will gradually be able to pull the cord all the way through and you’ll be left with a neat length of turned looping. Depending on the thickness of your cord, you can decide whether you want to leave it in place (for a more rounded loop), or snip off the secured top and pull it out (for a flatter loop). Now all you need to do is divide the fabric tube up into equal lengths for the individual button loops.
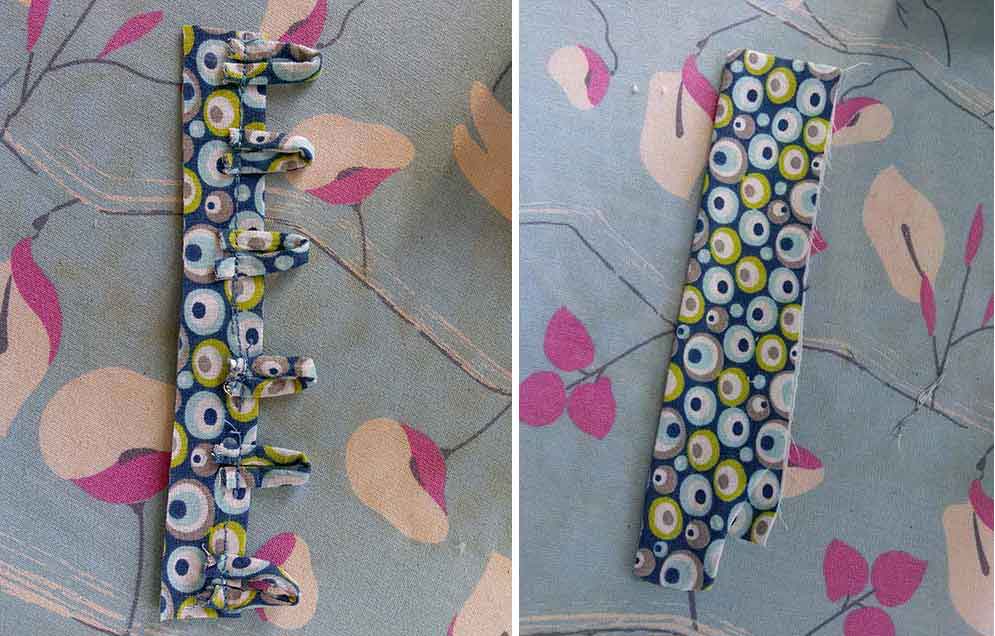
To attach the loops to the culottes, I spaced them out and stitched them to another folded strip of fabric, which I then sandwiched between the fabric layers of the front side opening. For the back, I constructed a 6″-long, 25mm-wide facing from the contrasting fabrics, with a sewn tab at the bottom. The raw edges of the facing were then sandwiched between the fabric layers of the back side opening, with the tab remaining free to be pushed either side of the opening, depending which way out I was wearing the culottes.
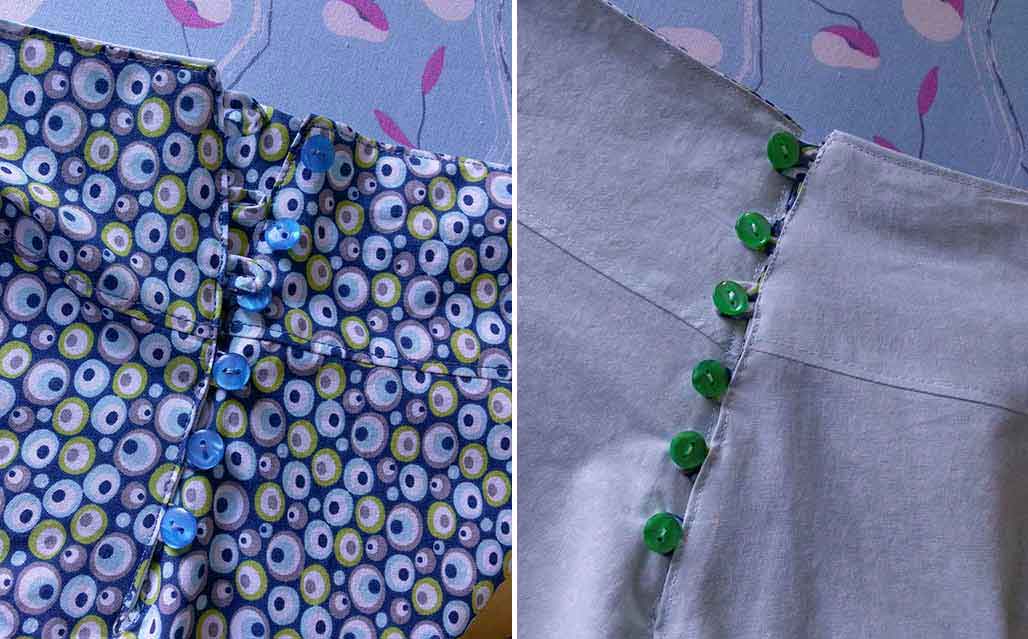
I’ve nearly finished, except for the buttons and the remaining hem, which needed a tiny bit of adjustment to be perfectly level with the contrasting layer. I took out the basting, re-pressed the hem and trimmed away the excess fabric before stitching.
So there we have them, a fun and funky pair of ‘skulottes’ for my wardrobe. Of course, while copying the original skirt pattern for size makes them a comfortable fit, they aren’t quite as perfectly reversible. Because pants patterns have a definite ‘front’ and ‘back’, wearing the pale green contrast fabric version of my culottes will mean that they do up on the right, rather than the left …
87 669 3331")