People complain about concealed or ‘invisible’ zips. They find them awkward, fiddly, unsuccessful – but they don’t have to be. Providing that you have the special sewing machine foot, they are quick to install and they look great – to the extent that I always recommend them to my beginner dressmakers, especially for dresses with a centre back zip opening.
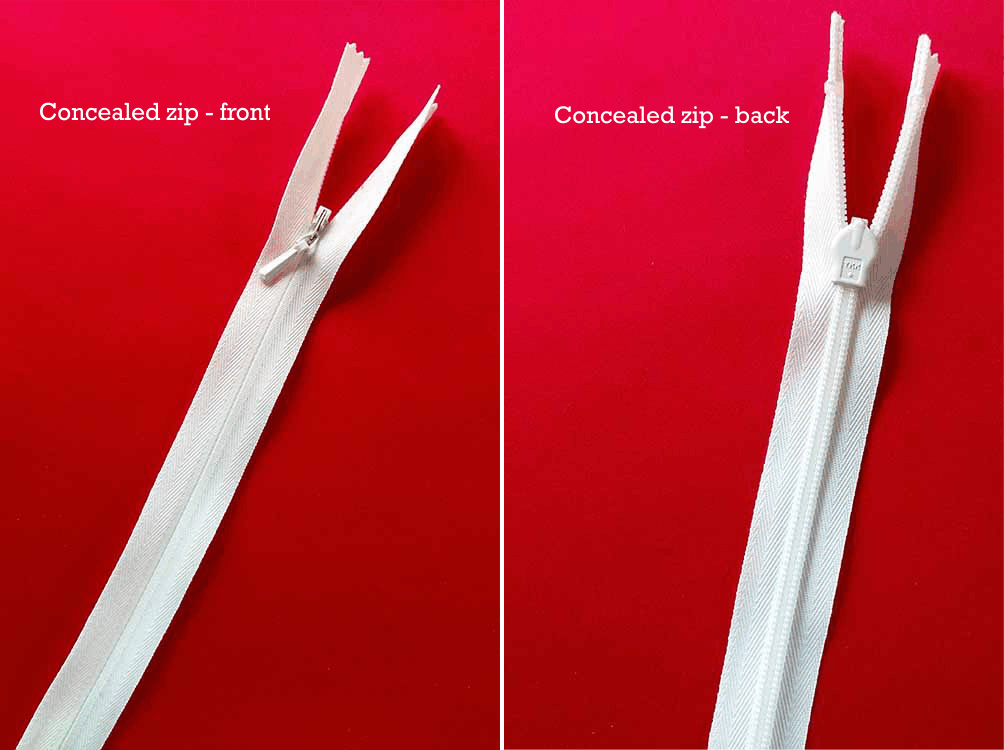
What distinguishes an invisible zip is that the teeth are concealed on the back of the zipper tape, and the front is smooth. When correctly installed, the only part that shows is the decorative pull tab at the top. If you open a YKK zip and press it before stitching, you will be able to see the stitching guideline that is normally hidden by the curl of the teeth. The other difference is in the application, in that you would normally leave the seam completely unsewn until you had installed the zip.
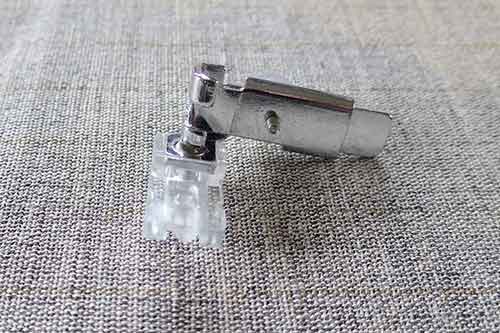
So, let’s get to work. For this example, I’m using a basic Singer Serenade machine, with a Janome-brand universal invisible zip foot and a 9″ YKK concealed zip. The fabric is a rather lovely duchesse satin, but one that frays horribly!
We’re going to leave the seam completely open and unsewn, until the zip is in. However, you should think of finishing the raw edges before you start. The Singer doesn’t have an overlock stitch, so I’ve used a narrow row of zig-zag.
As with all zips, you’ll get a better result if you sew both sides from top to bottom.
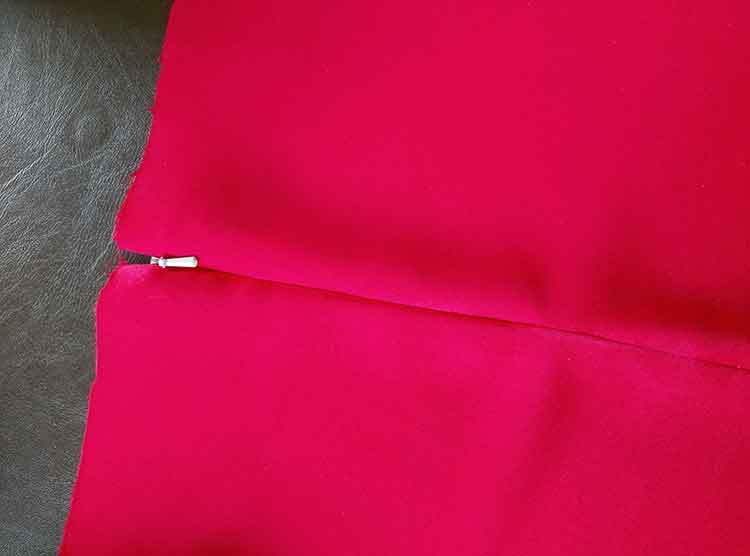
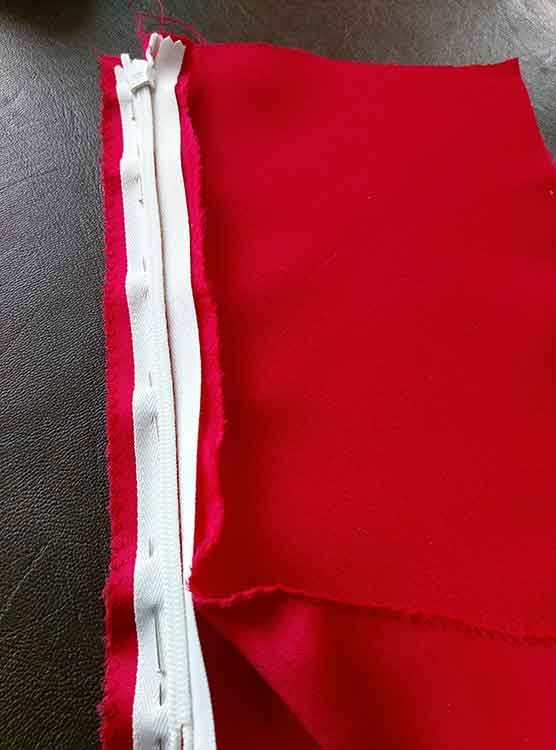
Placement of an invisible zip
The two sections of fabric are not joined, so we’ll deal with one section at a time. Open the zip and place it, face down, on the right side of the fabric, with the teeth on the seamline and the tape in the seam allowance.
Tip: did you know a lot of standard tape measures are 15mm (or 5/8″) wide – providing a useful gauge for the seam allowance of most commercial dressmaking patterns?
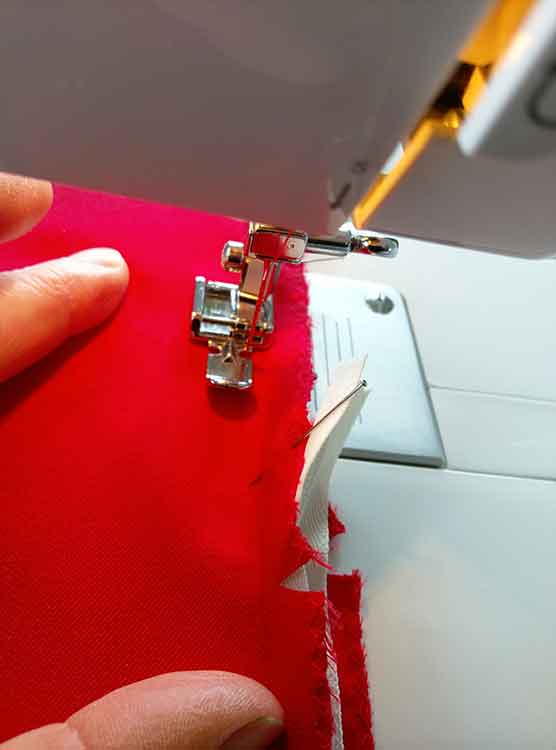
Stitching an invisible zip
I’m going to stitch the right-hand side of the zip first, so I’ve lowered the machine foot with the left-hand groove sitting over the zipper teeth. Before you start stitching, double-check that the teeth are fully in the groove. Remember to back-stitch a few stitches to secure the threads.
Stitch all the way to the bottom of the zip until the foot meets the zip slider. Stop and back-stitch to secure. Don’t worry that you haven’t been able to stitch the whole tape. We’ll finish it off later.
Now, close the zip and pin the other side of the zipper tape to the [left-hand] half of the garment, in the seam allowance. Open the zip and position the foot at the top of the zip, with the right-hand groove over the zipper teeth. Stitch as far as the slider, as before.
*You don’t have to close the zip to pin it to the other side of the garment. A lot of online demos show the seamstress pinning an open zip onto the opposite piece of fabric and simply stitching it in place. That method will work fine with sample fabric patches but, if you’re sewing garment sections and you want to line up necklines, waistlines or patterns, closing the zip before pinning is more reliable.
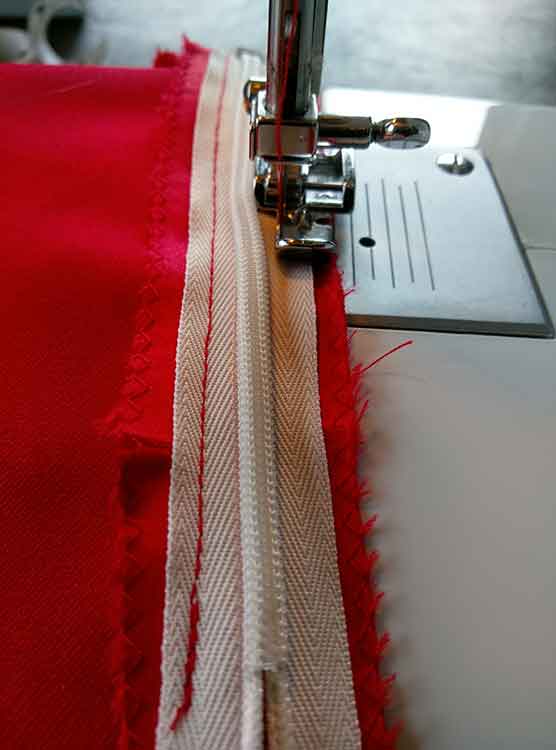
Finishing an invisible zip
So now you have two pieces of fabric joined by the zip, but open below the slider. We need to finish off the seam. Before we do, snip the seam allowance on both sides, where your stitching ends.
At this point, I recommend that you change your special invisible zip foot for the regular zip foot that came with the machine. Position it so that the needle passes to the right of the foot.
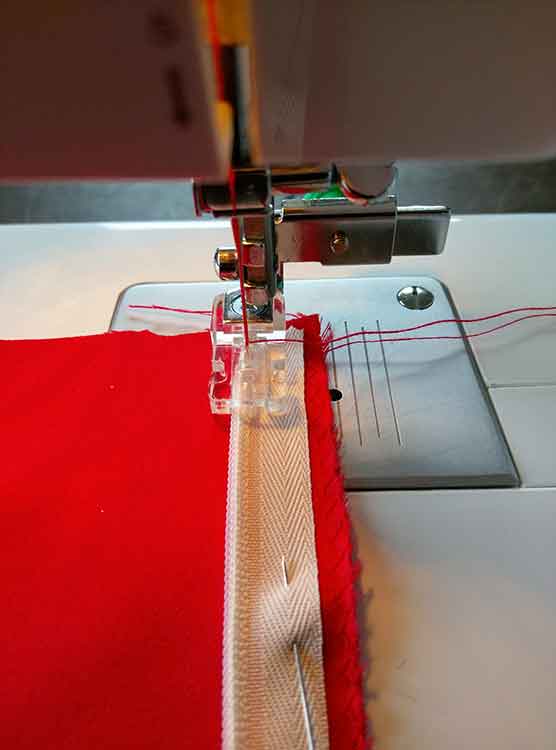
Pin the seam as usual, below the zip, and stitch using the normal seam allowance, aiming to meet up with (and slightly overlap) your zip stitching. Like mine in the photo, you might find that you don’t quite find the same line, but the couple of millimetres’ gap won’t show on the right side. I promise.
Finally, stitch the zipper tape to the seam allowance. To all intents and purposes, that’s it. With a little careful pressing, you should now have a perfect invisibly-installed zip. The one last thing you might like to do is to stitch the zipper tape to the seam allowances for stability and a little reinforcement.
And there you have it. A perfectly invisible zip application. That wasn’t so hard, was it?
87 669 3331")


[…] my last post, partly in response to an enquiry about where to buy an invisible zip foot (see below)*, and partly […]