 Just for the record, before I start, I don’t make men’s clothes. Ever. Well, not usually. However, having heard my husband complain for the umpteenth time that he couldn’t find durable, good-quality trousers for everyday use, I rashly offered to make him a pair. Actually, he found some ‘ideal’ heavy-weight brushed cotton twill fabric, while I was fabric shopping for myself in London’s Berwick Street, and asked me if I would make him a couple of pairs. That was over three years ago, hence the proverb.
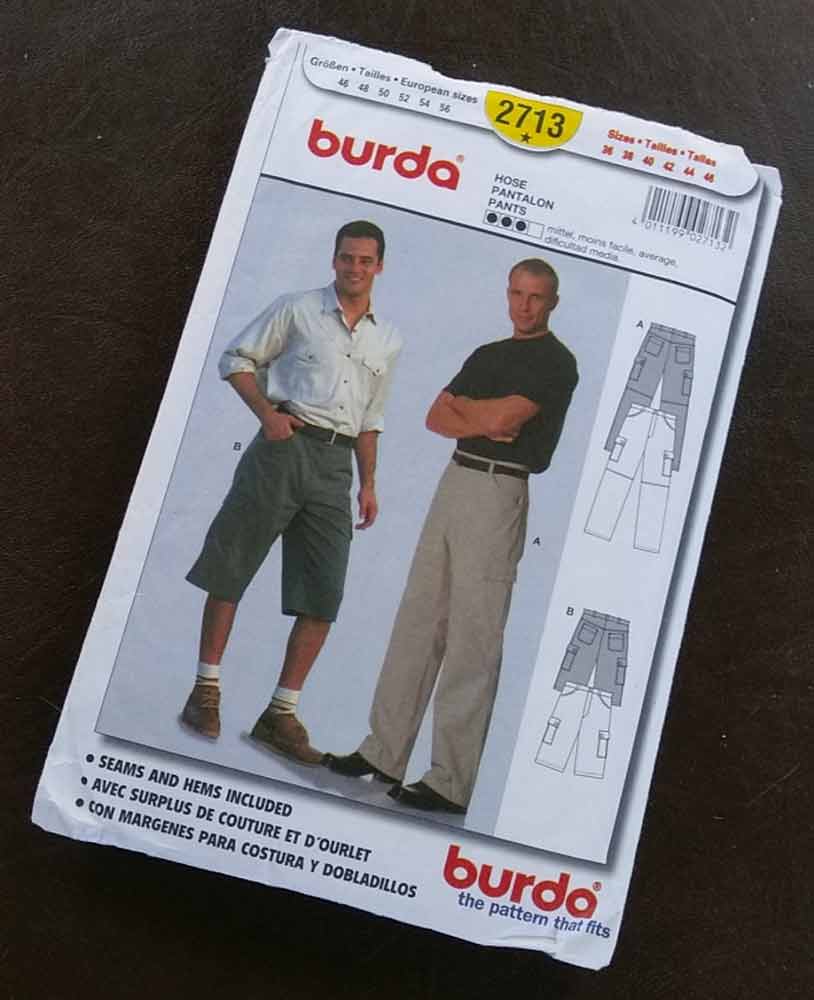
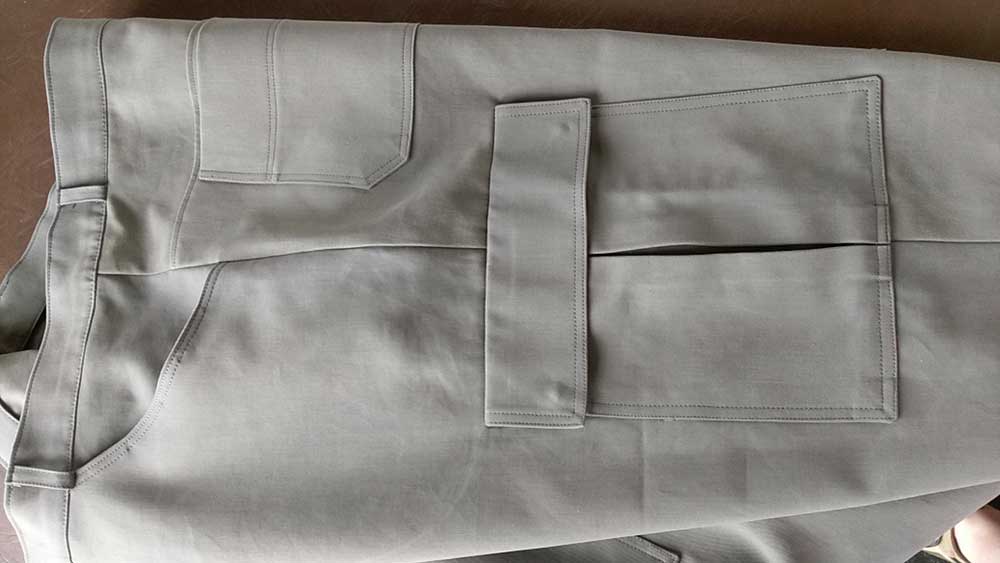
The pattern I’m using is an old one, Burda 2713, now discontinued. I’d made him a pair of shorts from the same pattern, years ago, and they still fit him well. I made a couple of modifications to the trouser pattern. I couldn’t, for instance, see John wanting a seam across the upper part of the leg, and hidden snap fasteners seemed, to me, smarter than button closures on the cargo pocket flaps.
 The key things with men’s clothes, I think, are accurate stitching and crisp, well-pressed, details. Of course, you could say that about any dressmaking project, but since most men’s clothes don’t lend themselves to frills, fullness, or busy prints, there are less opportunities to hide small errors! I therefore took great care to mark fold lines, stitching lines and balance points, using a combination of carbon tracing paper and scissor snips. There isn’t much difference between the right and wrong side of this fabric either (the wrong side was identifiable most easily by feel and a slight inconsistency in the dye), so I put a tailor’s chalk mark on the wrong side of each pattern piece.
 This fabric is tough and I was glad of my Pfaff sewing machine’s semi-industrial motor. With a 90/14 jeans needle, it coped easily with multiple layers. The most important design detail on most trousers is the pockets and it’s essential to make sure the rows of top-stitching are parallel and the corners are crisp and square. You need an edge tool of some sort. I enjoy using my hand-made wooden point turner and mini clapper tool from Julia Stern Designs.
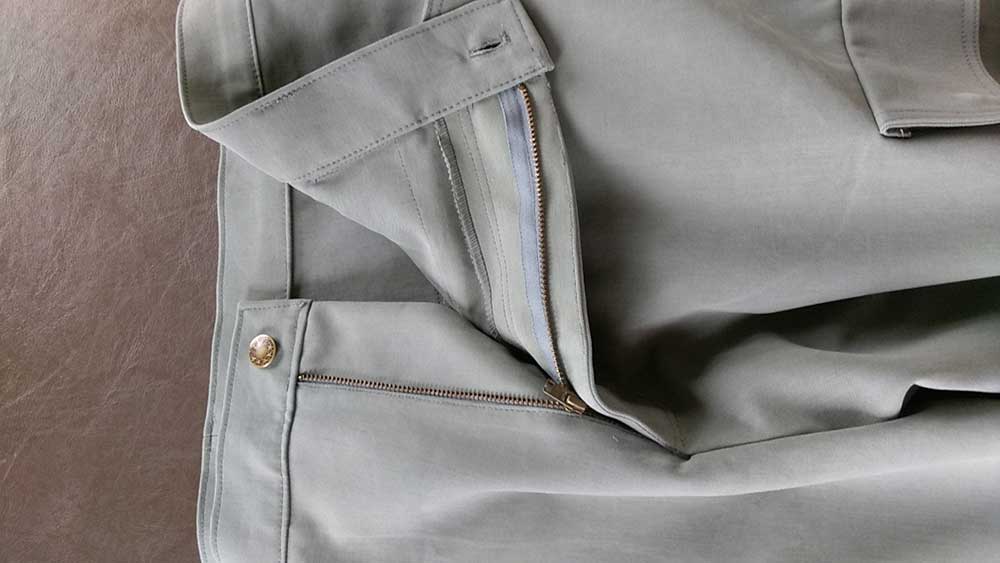
As you might expect, I’ve used a metal zip for the fly closure. The top stitching could be a challenge, though it’s surprisingly easily achieved by hand rotation of the wheel to place the needle carefully into the gap between the zipper teeth. I teach fly zip closures in the second of my Skills Development classes for non-beginner dressmakers, but – for those who are unable to get to those – I may use John’s promised second pair of trousers as the basis for a video tutorial.
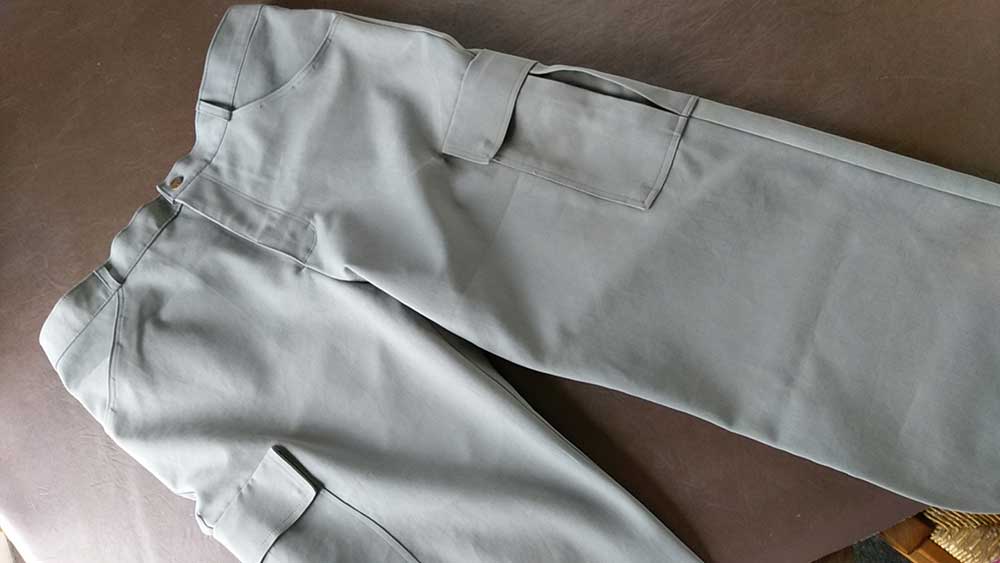 For the earlier shorts, I used the same buttons on the pockets and waistband but, since I hadn’t used buttons on the pocket this time, I used a bronze jeans button. The instructions tell me to hammer the tack gently into the button but, this really only works if you use a heavy hammer. If at all possible, it’s best to give the tack a good, square whack to secure it in place first time. If you don’t you’ll risk bending the head of the tack, which could allow it to slip through the hole in the fabric.
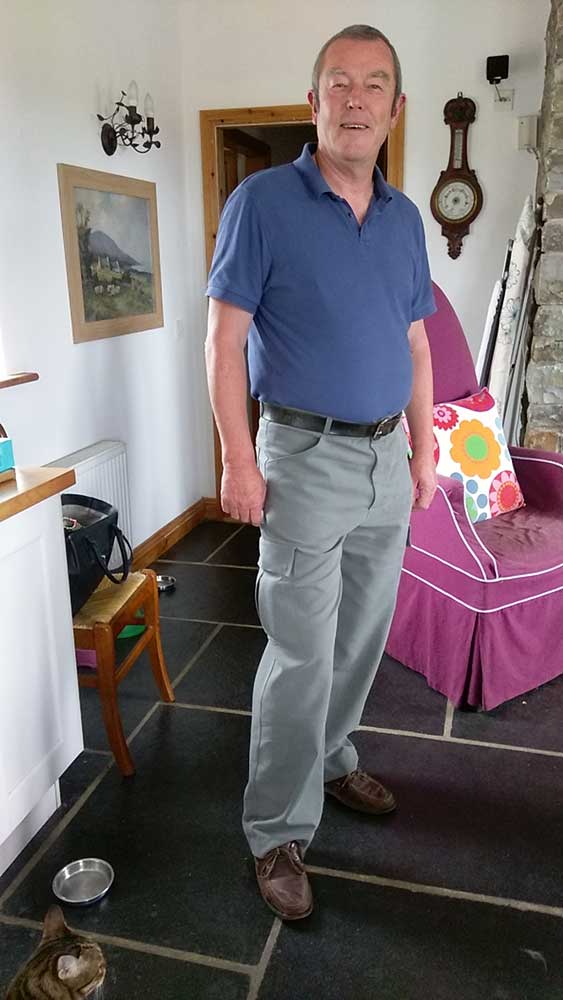
I finished off the hem and attached the belt loops and the trousers were done. John looks pleased with them, don’t you think?
87 669 3331")


Very nice Bridget, really professional looking
Thank you, Leonie. That’s the aim!